Sunday, December 13, 2015

Thats more like it

December when ones mind turns to snow. Sadly its not cold and theres no snow yet but whaddya gonna do?

Last weekend I tried firing up the '98 Jag but she was a no go. I farted around troubleshooting for awhile and finally found that the fuel pump was failing to chooch. This was a big setback, I'd intended to spend the day replacing the track but ended up troubleshooting the day away...
I guess this finally makes the '98 fit in around here, getting its chance to be a dead sled.

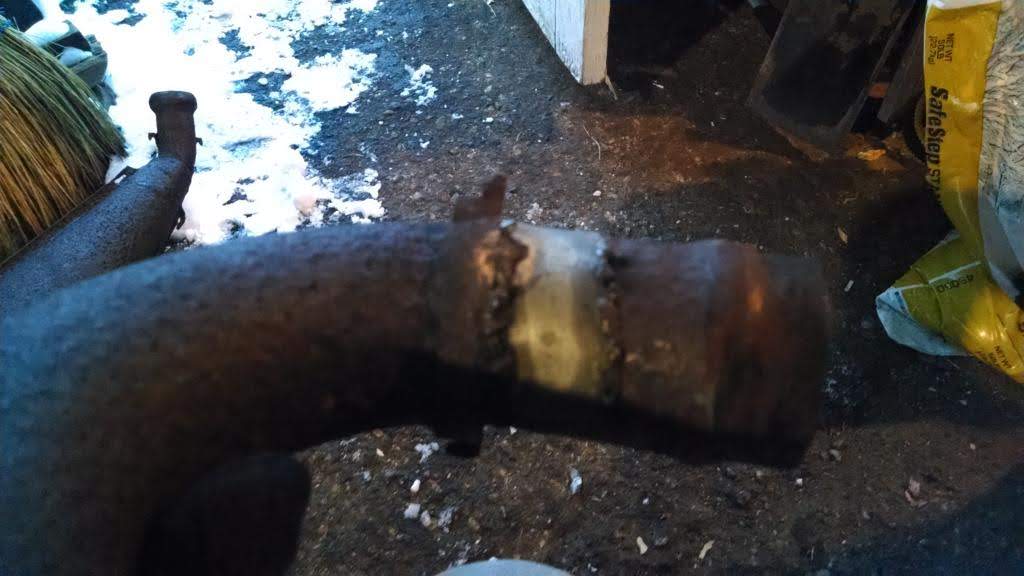
I was ordering Christmas presents on Amazon anyway so I added a Mikuni square, single output pump kit to the order. Tonight I finally had time to get the kit in place. Turns out the square single output pump is REALLY simple. There are 4 screws to take it apart, 2 gaskets and a diaphragm and that is it. I replaced a couple fuel lines while I was there, its amazing how long the original lines last. I put some tygon (yellow) lines on, we'll see how they last. The clear hose is usually the worst, it gets hard and doesn't seal. Blue is second best and yellow is supposed to be the best, we'll see. I need to get some clamps, they didn't come with them stock but you might remember a couple years ago on the trail with my El Tigre when the fuel line came off one carb. If I'd kept pressing on when that happened there could have been a nasty fire...

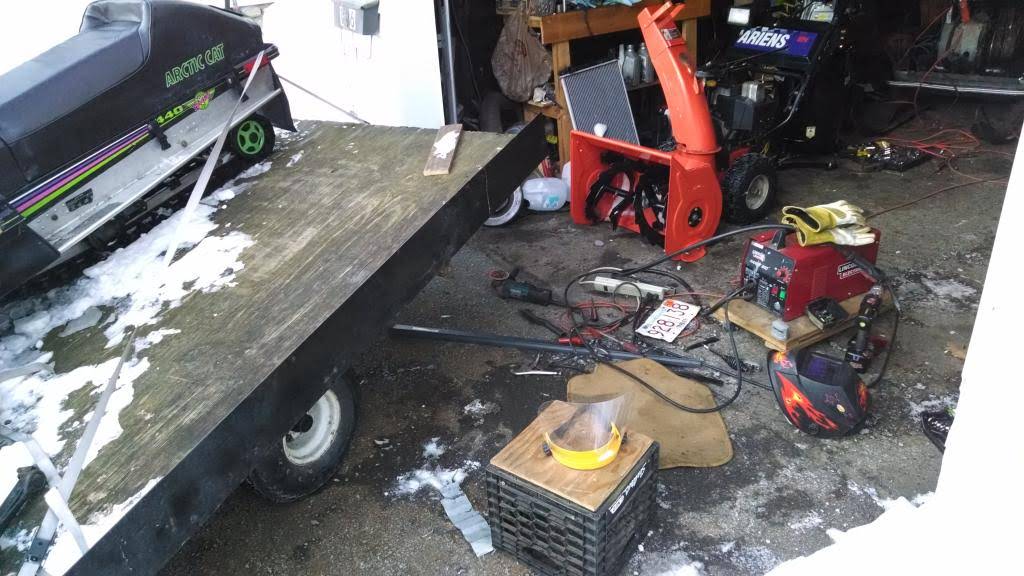
Anyway I got it all buttoned up and on the 15th crank just as I was about to lose hope it fired up. Ran rough for a little while but finally smoothed out. I think there might have been a hint of this problem last spring when I bought the sled, it would run but would occasionally stumble and the sled would about pitch me over the handlebars, now its much smoother. Next step is to put it on the trailer and get it over to buddy Chuck for a track replacement. I dunno what the previous owner did but the track is missing a bunch of lugs, looks like somebody got after it with a hot knife.


Earlier in the day I'd gotten the '91 Jag running, that one also needed about 15 pulls but no other real work. I think it needs some clutch work, it was awful hard on gas last winter. I'll ask Chuck to take a look at it too. Last Monday I got a SAM pass for it so that sled is ready and legal to ride. The '98 still needs to be registered, I'm hoping this Friday I'll get a chance to run down to Worcester...

Monday, August 17, 2015

Working on sleds in August?

So unlike me, I usually wait until it gets cold, then I have to rust to get stuff done...

Anyway last winter I tore the engine on the Pantera all apart and then lost interest since it snowed so much. Now I'm back to working on the tin.


Initially I tried to cheat this and paint it a bunch of times with high build primer and that did take out some of the rust pits but it would have taken a year of painting and sanding so I finally mixed up a bunch of bondo and filled the pits giving the whole surface a thin coat. I knocked that back and it it with the high build to fill the scratches from the 100 grit sandpaper I was using. Bondo clogs sandpaper bad but 100 grit works better. I need to knock back the primer with some 320 grit in a block and then I think I can prime it one more time and paint. I'm not looking for perfection here but something way better than what I had.

Need to do the pipe while I'm at it but I've found that high temp paint needs a good clean surface to stick to. I did my '70 Ski-Doo pipe back years ago and it just flaked back off quick...

Monday, May 11, 2015

More putting away

Two weeks ago I managed to get the rest of the sleds put away. The '98 Jag fired up easy, its got a weird bog at part throttle that seems almost like ignition cutting out. It seems to go away as it warms up but as I've only ridden it around the house twice on the grass I'm not sure what to think of it yet. The Grand Touring fired right up too. I was surprised, after sitting for a couple months I expected the battery to be dead.

Sadly the Polaris Cobra fired right up but played its game of running only on one cylinder. I think thats got a leaking needle in the mag side carb. I'd forgotten and left the gas on and the bottom end on that side had a bunch of gas in it. Interestingly when that sled fouls a plug it FOULS a plug. I'm 1 for 4 cleaning them. My final effort involved carb cleaner, a torch and sandpaper. I did finally get it running right on both sides so I could get Seafoam gas additive into both carbs.

The Jag and Cobra got washed and waxed. I used some "Wet and Black" on the plastic on the Jag which seemed to darken it up some. Like the '91 I managed to get the windshield off the '98. It uses the same kind of screws as the older sled although it also uses some o-rings. I broke a couple of the o-rings so I'll need to replace those in the fall.

I took pictures of the Ski-Doo but I doubt I'll get to sell it this summer. Probably I'll hold onto it and sell it once the snow flies again this winter.

The track on the '98 Jag isn't fantastic so I asked the guys over at Vintage Sleds if I should get the same again or go bigger. The sled came with a .75" lug track but for about the same money I can go 1", 1.25" or 1.5". The consensus seemed to be 1.25" so I'll save my pennies and pick one up later this summer. Hopefully it'll make for a nice ride in powder snow which will be real handy if we go to camp this winter which is something I really want to try to do.

Wednesday, April 29, 2015

Stuff is still going on

Yeah the season is over, the snow is gone, the rains have come, well the rains SHOULD have come but haven't. That doesn't mean the sleds get neglected, or it SHOULDN'T mean the sleds get neglected...

Saturday I got some time to start putting the machines into storage, step one was to pull the windshield off the '91 Jag, the windshield comes off that sled easily so I pull it, otherwise the tarp will pull on it all summer and fold it in effectively ruining it. Then I added a couple ounces of Seafoam gas additive to the tank. I've been adding Seafoam at every fill up so this dose wasn't all that important, I also managed to run the tank down pretty far the last time I rode the sled so I didn't use very much.

Then I scrubbed the sled:

I used normal carwash soap and my normal car scrubbing sponge. This is a chance to give the sled a good check over, look for anything broken or needing attention. I found some cracks in the fiberglass of the hood but nothing too bad. The I fired it up and ran it around the yard to its summertime spot. I was very pleased in that it started right up no problem. That got the engine warm and helped dry out the hook and engine compartment. Then I waxed the hood and put two yogurt cups with mothballs in the footwells to keep the mice away.

There are a couple more steps, I need to stop and get a tarp for it, the canvas cover I have will get killed by staying outside all summer. Then I'll start it one more time and turn off the gas so the carb bowls empty out some. I'll shut it off before they run out, 2 stroke engines really don't like running out of gas. The bowls will still have some gas in them, theres nothing I can do about that but having them half empty will help to keep varnish from building up on the jets and causing trouble.

Finally I'll hose down the whole engine compartment with WD40. This gets rid of any remaining water and puts a water resistant coating on the metal parts. I did this last year on this sled and I was very pleased with the results. Its especially important since I don't have covered storage for the sleds although even if I did I think I'd still go ahead with it. I wish I'd been doing this on the Pantera, if I had I wouldn't need to repaint the tinwork...

Sunday, April 19, 2015

Its not a dead sled but...

Picked up a new-to-me sled yesterday,


Its a 1998 Jag 440 with just over 3100 miles.


Its in good shape although the hood is broken a little at the hinge:


The guy claims the wind caught the hood while it was open but he's repaired it with some tin on the inside and fiberglass on the outside. It looks like a decent repair although I'll keep my eyes open for a replacement hood. It'll also need a track in a year or two, I priced the sled with that in mind...

I bought this sled because my '91 Jag beat the snot out of me last winter. When the trails were nice and flat it was a nice sled to ride but when they were bumpy it wasn't. This '98 has at least twice as much suspension, this is the last generation of the Jag, they stopped making them in '99, its got the FastRack long travel rear suspension and should be a much more comfortable ride. Its got aftermarket plastic skis with good carbides so it turns great. Starts real easy, and with a single carb its easy on the thumb and should be pretty easy on gas.

Overall I'm excited, this sled should have all the good my '91 has plus be more comfortable to ride a win overall.

Tuesday, April 14, 2015

Call it

What a winter its been but as I write this the snow here in north central Massachusetts is about gone. They tell me theres still riding up north but sadly I have no time for that and honestly with such an epic winter I'm about all done. I did something like 300 miles this year which is a record for me. To get to that mileage we had at least two 50 mile rides which are also records never mind having just an epic amount of snowfall.

My last ride was actually several weeks ago, I went out by myself for another 50 miler. Angie was willing to go with me but the snow conditions were less than idea for a liquid cooled machine and I was worried the Ski-Doo would overheat. The Jag just ate up the miles no problem and most of the places I rode we nice and flat so its less than fantastic suspension wasn't a big issue. After a whole season of riding past it I finally found a spot lots of people had taken pics of and Ben had told me about:

Looks to me like some sort of railroad or maybe a trolley had run through here. This runs down through the Birch Hill recreation area by the parking lot and I think the tracks must have continued down into Lake Dennison park. I didn't realize it before but I can see them as tracks now.

The Jag seems to get about 10-12mpg limiting me to around a 50 mile run which is fine as thats about as far as I can stand. The sled has good front suspension but the rear end only has a few inches of travel. I've started looking around for something newer with more suspension. Randy tried to warn me about that last year but I didn't listen. My plan is to sell the Ski-Doo and Jag and get a pair of newer machines like a Z440 or newer Jag DLX, or maybe a Polaris with an Xtra 10 or Xtra 12 suspension. Something I can ride on the whoops without getting beaten to death.

Wednesday, March 4, 2015

Stupid trailer

Seems like I've had to fix my trailer just about every time I've used it this season, clearly its due for a major rebuild in the off-season.

You might remember last time the passenger side taillight fell off. This time it was the license plate which was fortunately held to the trailer by the wiring for it's light.
Heres an in-progress pic of the repair:


I actually had to do a fair amount of work for this one, the bracket that held the license plate was just gone, a piece about twice the size of a quarter was left along with one of the bolts that held the plate. I ended up having to cut that bolt (and the palm of my hand while I was at it) to get the plate back off.
The repair was fairly simple, I welded a piece of corrugated pickup bed repair steel to a piece of 1/8" flat stock, then drilled holes for the plate mount and welded the flat stock to whats left of the trailer. The welds are NASTY, there wasn't much to weld to but if you can't make 'em look good make 'em big so they won't fail.

In the end I actually made the corrugated part too big because I didn't pay attention to how the plate light I'd bought mounts:

I'd added the tab on the right to hold the light which actually mounts perfectly above the plate. Oh well, I'll fix it when I fix everything else. Using a big plate like this will keep the license plate from getting bent as much.

To weld in the plate I needed to remove the tail light and of course the stud spun, so I ended up cutting the nut that held it on so that had to be replaced as did the plate light.

Monday night I went to the snowmobile club meeting and on a challenge I decided to ride in. About halfway to the parking area I hit a big bump and the running lights went out on the trailer. The brake and turn signals still worked though. Since I didn't have far to go I just kept going.

Today I finally took time to figure out what was happening. The first step was to prove it wasn't my truck which was easy, put the meter on the plug at the truck and it was fine. So then I went to the trailer and removed all the bulbs with the meter connected and set for resistance. In a normal world the meter would read some level of resistance while the bulbs were installed and open circuit (1 on my meter) when all the bulbs were removed.

In the pic above the bulbs have been removed and the meter is still showing a connection. Since I had recently worked on the trailer I automatically assumed my work to be faulty. I pulled the new tail light and let it dangle from its wires, when dangling its not grounded so it couldn't be the short. When that didn't help I was starting to get worried about one of the wires where they come down from the hitch. I got under there and started looking around and thats when I noticed the running lights under the tail of the trailer. When I got under the tail I found the wire running to them had been pinched in a piece of angle iron that had been used to strengthen the failing rear crossmember. When they'd welded in the angle iron they captured the wire between sections of weld, what a dumb move.

Those running lights had never really worked anyway so I just cut the wire. They're in a crappy place, under the tail of the trailer so they get whacked on the ground when the trailer is tilted. When I rebuild the trailer I'll flush mount them to the rear of the trailer and weld a frame around them to keep them from getting hit. Thats how my last trailer worked and it was a pretty good system. I'll use LED lights which are thinner and less likely to get hit anyway.

Tuesday, February 24, 2015

Weld weld weld

I was going to ride Sunday as we'd had some more snow but I came out to find this:

whoops. It turns out my old trailer is pretty rotten underneath. The frame the springs attach to is solid but the pieces that span between that and the side rails are all bad.

You can see in this pic that the previous owner had done some repairs with pieces of angle iron in the past.

I'm debating if I replace this trailer or buy some steel and rebuild it. I'm pretty much 50/50. Ben has an enclosed trailer he's talking about selling. I'd been talking about an enclosed trailer anyway, it would keep my nicer sleds from degrading over the summer like they tend to do when left under tarps so that would be a good option. On the other hand if the only thing this trailer needs is three or four pieces of steel I'd be a fool not to replace them. At the very least it would make the trailer valuable enough to sell or take to camp where we could use it as a utility trailer. For now I won't be taking it very far from home.


Anyway I welded a strip of steel from the angle iron to the side rail and then welded the light mount to that. Its not terrific but it'll get me through the rest of this season.

With that done I spent some time welding up the pipe for the Ski-Doo. When I was riding Saturday it popped and got louder. I found a bunch of pinholes in the main pipe, mostly around places I'd welded before. That pipe is looking like the Frankenstein monster. I cleaned up those welds and added some filler. I also fixed a spring hook that had broken. I need to finish out by pulling the last part of the can and rebuilding its flange to the next piece up stream. I managed to do a similar repair on another piece that came out nice. If nothing else this kind of work helps me become a better welder.


Tuesday, February 17, 2015

A little light Jag repair

The Jag has been a great sled but theres a couple things bugging me about it. One was a spot on the windshield I managed to crack with just a tiny tap on a tree. Today I took the time to put some packing tape on the crack.


This was more challenging than I would have expected because the Windex I was trying to use to clean the windshield before I taped it kept freezing... Got it there eventually and now I'm thinking that it looks good enough I might leave it that way. I'd been thinking I'd buy a new windshield but they're kinda expensive and will just get broken eventually... Maybe when I take this one off in the spring I'll re-enforce a little where I couldn't get to with it mounted but I think its staying.

I've also noticed the sled getting a little louder. Theres a gasket where the manifold meets the muffler and surprisingly Troy Arctic Cat actually had one so I replaced it:

New gasket installed


The old one didn't look too bad and I didn't notice much difference in my test runs but it seemed like it didn't get loud until I'd been riding for awhile. I wonder if the old gasket was letting exhaust by when it got hot...

Finally the kill switch doesn't work. Arctic Cat used a kind of pain in the ass system to shut the sled down if the carbs get stuck open. When I bought the sled it was bypassed with a nice jumper but I've had a couple cases this year where the carbs have been a little sticky and I'd like to have the kill switch back so I spent some time looking at it.

The system is interesting there are switches in the carbs and two switches at the throttle lever. One of the throttle lever switches is activated when the lever is all the way back, when you move the lever that switch opens and the other closes. The sled won't run if one of the switches isn't closed all the time. The idea being if a carb was stuck open the cable would be slack and neither switch would be active thereby shutting the sled off.

I spent a bunch of time playing with adjusting carbs because I thought I was getting caught in the transition period between one switch opening and the other closing. It turns out the first switch is never closing:


If you look directly below where the cable mounts to the throttle lever theres a hole. That hole is directly against the first switch (visible to the right of the ferrule the cable goes into) so nothing ever pushes against that switch. I've asked about it over at vintagesleds.com but I think what I'm going to do is find a set screw that fits into that hole and wind it in so that it just pushes on that bottom switch. While I'm at it I should see if I can fix the thumb warmer, that'd be nice to have...

Sunday, February 15, 2015

And sometimes this happens...

We got another 10.5" of the blessed white stuff last night which managed to wipe out all the tracks in the yard. That of course needed to be fixed so I fired up the '91 Jag for a good rip. 10.5" is good deep powder but the Jag just eats it up, no problem at all so full of confidence I hit the trails for one of my pirate runs.

Nobody had been through since I went last week and even then I'd only made one pass out and back which doesn't make much of a trail. About 200 yards in I found a 5 FOOT deep drift, fortunately it descended to only 3 feet at the left side of the trail, unfortunately that was right next to a tree. I split the difference and blasted through a 4 foot wall of snow, had no choice really, there was nowhere to turn around and I didn't dare stop for fear I wouldn't be able to get going again.

With that behind it was a hard but slow run to where I leave the railbed and cross to a parallel trail. I was nervous about this because its a tight area and wasn't sure if I could keep headway but the Jag just kept slogging along. Finally got to where I could turn around, decided I'd do a clockwise turn but suddenly realized there was a deep spot right where I was headed, reversed course and ended up foolishly getting off the power and hitting that deep spot heading the other way...


I commenced to digging. This was a learning experience, with older sleds that have no rear suspension travel you heave the back end over to the side, fill in the hole under the track, heave the sled back on top to pack the snow, then back off and repeat. With a sled like my Jag that has some rear suspension you dig out under the footboards the length of the sled, then sit way back on the seat and apply power, the track hopefully finds traction and you're out. I had to try the old method once before I realized the new method would work better.

Here's a look at how close I was to completing the turn:


I think my mistake is that I thought I was going to stay in the seat through the turn, I should have been standing on the left footboard. I also realize now that I should always plan on a counter clockwise reversing turn when I can manage it because it'll be easier to stay on the throttle through the turn. In a right turn it gets hard to pull the throttle since the right grip is now down by my right knee.

Ahh live and learn right? The good news here is that since the Jag is such a good powder sled I feel much more confident about trying to make it to our camp in Maine in the winter. The camp is 3/4 of a mile from the road with no trails kept in the winter so we'd have to break trail through what would probably be powder similar to this.

I took the Jag yesterday into the state park and rode the groomed trails, it rides good but fishtails something awful. I'd decided that it needed a new track but considering its powder performance it might just need studs. Actually if I could get a deeper lug track AND studs and slightly wider plastic skis this would be an amazing powder machine...

Saturday, February 14, 2015

Working with the groomers

Suddenly I realize I've been remiss in telling you about riding with the groomer...

As with all clubs the Coldbrook Snowmobile Club is basically run by a small group of people who do all the work. I've seen this a bunch of times in a bunch of different clubs. Not wanting to be a freeloader some years ago the last time I was part of the club I got in on a work day and helped prep one of the groomers. That was kind of cool but just a one time thing.

This year I thought I'd help out with the actual process of grooming. Technology has progressed and the club has a Facebook page, I got on there and found that they were looking for people to help out so I volunteered. Last week I met up with Chris and rode in the ASV on the southern run. Last night I rode with Ben in the Pisten Bully in Lake Dennison State Park.


The ASV is a fair sized machine, maybe the size of a family sedan, the Pisten Bully (pictured above) is a brute the size of a box truck. The blade is about eight feet across and its sports a 200HP Mercedes turbo diesel engine. The guys say that grooming is "like watching paint dry" which is more or less true. Its a bit like snowmobiling very slowly, the machines creep along at about 6mph. Its also a bit like plowing snow but backwards. Where your average snowplow pushes snow off the road the groomer's job is to pull snow into the trail, both to fill in the low spots but also to build up a base.


Here's some of Ben's handy work, even after half a day of riding it still looks real good.

I don't know yet if this is going to end up with me actually being a groomer driver. I'd guess I'll be a backup, it seems like they've got enough actual operators right now. It also takes a long time to get qualified to operate a machine, about 2 years. The reason for the long training period is that the groomers only really run about 100 hours a year which if you think about it is really only 2 and a half 40 hour weeks, it takes time to get proficient. Honestly I could probably run either of the machines through the woods right now and keep the drag on the ground but theres so much more to it, theres knowing how to fill holes, which high spots to cut and when to leave them alone. How to raise the drag before the top of a hill so you don't scrape the snow off and when to drop it on the back side. 

Ben is a great teacher and I started to absorb some basic theory last night but clearly I've got a long way to go. I've also got to learn to deal with problems that show up, the machines are generally pretty old and stuff breaks so you've got to be self-reliant. I'd like to think I've got an advantage there but I bet I really don't. These guys are mostly blue-collar folks who have real jobs where they work with their hands and tackle mechanical problems all the time. Being a "thinker" I'm way behind on that front and have to work harder to make up for it.

Anyway I don't know where this is going to lead other than to some late nights, last night I met Ben at around 6pm and headed home around 12:30am which was better than the week before when I met Chris at 6:30pm and headed home at 2am...

Thursday, February 5, 2015

Progress!

Finally got my shipment from Dennis Kirk so work can progress.

The puller that I bought for the Pantera doesn't fit perfectly, the smaller 6mm holes don't line up perfectly with the holes in the magneto. Fortunately the larger holes line up well enough that the 6mm (grade 8) bolts would thread into the magneto. I added a little grease to the pulling bolt to reduce friction, then tightened it up. The puller has a cool little rod to keep the engine from turning. Or rather it USED to have a cool little rod to keep the engine from turning, that promptly broke off.

I barely put any torque on it at all. So I put the rope back in the cylinder and whacked the end of the puller a couple times. Then added a little more tension and "CLANG!" I thought I'd broken the puller but:

The magneto popped right off. While I was on a roll I bought a #3 phillips head driver, chucked it into a 1/4" socket and pulled the screws holding the PTO side plate on. I'd tried with a #2 phillips before but I couldn't apply enough torque to break the screws free.
Now I need to haul the engine back into the basement to replace the seals.

After taking the dog for a walk I went back to the Wankel Panther. I cleaned the mag side crank shaft really well and lubed it with axle grease, I also greased the shaft and held the o-ring in place with yet a little more grease.

I briefly considered some hylomar for holding the o-ring but was to lazy to go back into the house for it. The grease will melt out the first time the engine gets good and warm and won't cause any trouble. There was no o-ring there at all before so this has to be better...

The grease kept the o-ring in place perfectly allowing for easy installation which I strangely didn't get a picture of.

Getting the stator in place correctly took more time than I would have expected. I managed to get it not seated fully on one side which made the magneto hit, glad I rolled it over a few times before I buttoned everything back up. It turned out I had some wires trapped, once I got those aligned correctly everything went together easy.

I quit while I was ahead since I couldn't find my multi-meter. I want to check to be sure the points are opening before I button up the engine.

Saturday, January 31, 2015

Not again!

Went to move the snowmobile trailer so I could plow around it and realized it was frozen to the ground. Similar to when I had the sleds frozen down a couple weeks ago the rain had gotten under the foot on the tongue jack and frozen. Worse the trailer sat all summer with nothing under the jack and the foot on the jack and sunk about an inch into the soft ground. I dug all around it and heated the foot with a torch but my puny propane torch was no match for the cold of the ground.

Today I dug around in the garage and found an old Mercedes screw type jack. This is the kind of jack that fits into a hole in the body and has a big crank to lift the car. I put the jack under the tongue to put some pressure on the foot, then boiled up a gallon of water. I poured the hot hot water on the foot and it popped right out no worries.

As usual I forgot before pictures but here's the rig:


and a close up on the foot:


With that done I fired up the Jag and headed out for a ride. This was a "pirate" run, I hadn't put the registration stickers on yet and went out on trails of dubious provenance. It was a good ride and I did about 15 miles in total before Angie got home.

Once Angie was with me we loaded up the Jag and the Grand Touring and headed to Lake Dennison State Park. We also added our registration stickers and trail passes to make it all nice and legal.

Old junk in the park:

The Jag performed fantastically, on the pirate run it was everything I could have asked for, it busts deep powder with no problem although I might consider putting some studs in it, I did climb a couple hills really slowly slipping and sliding. On the groomed trails Angie kept right up and said it was fun to ride.
As always that stupid Ski-Doo did its job with no real issues. It wouldn't start when I first went out, the battery was flat so I put the charger on and it drank an full 6 amps for awhile. I should probably pull it in the summer and put it on a desulfator, sitting is hard on them. It roars and bucks and darts a little, clearly I need to work on the alignment some more but it goes like stink. There are only two faults, the speedo doesn't work which is probably the drive gear, I need to pull it and see which type so I can order a replacement, and the thumb warmer which I should also take a look at, apparently these are known for wires pulling out...

We did 20 odd miles in the park, rode up and around Birch Hill Dam which was pretty cool. Overall a good day.

Friday, January 30, 2015

You take the good you take the bad

I realize I have been remiss in updating since SNOWMAGEDDON.

You might know that the east coast got hit with the "storm of the century" early this week. We live on what ended up being the western edge of the storm so while we got a good foot of snow it wasn't anything all that exciting. I got outside Tuesday and rode around in it some with my '91 Arctic Cat Jag 440. That thing is a terrific powder sled, its got the power and it floats good. Later that day I wanted to get the '79 Polaris Cobra out, it started up well enough but only went about 10 feet and wouldn't run right, the PTO head was cold. I figured it had lost spark and messed around with it for entirely too long (I actually cleaned the points) before I got my inline spark tester out and found that spark was fine. I messed around with it awhile longer before I gave up in defeat.

Fast forward to today and I got the chance to mess with it again. I pulled the plugs and they were nasty, greasy. I sprayed 'em with carb cleaner and wiped the electrodes and they'd spark again but the sled still didn't run. When I pulled them they were wet again. I dug around in the garage and found a set of new plugs (BR8ES if you'd like to donate some) and stuck them in, same deal although it ran a little on one side. One side firing isn't strong enough to drag the other side along.

Finally I remembered when I first got the machine that it'd flood real easy if I wasn't careful and I used to start it with the gas turned off. So I cleaned the plugs again and heated them with my plumbers torch. Then I rested them on the engine tin and with the plugs hooked up I cranked it a bunch of times with the gas turned off to clear out any flooding. I think the sparking helps clean the plugs too. Put 'em back in, turned on the gas and it fired right up.


Don't it look all smug?

So I ran it around the yard some, it was having a hard time with the powder but not too bad. I took it down to the trails. Google says I did just over 3 miles round trip which matches what the Jag said when I made mostly the same run on Tuesday. The sled ran perfectly, I did take the first bump on the trail too hard which felt like it compressed my spine. Last year Allen dragged a pallet back and forth on that section so it was groomed nice. This year he moved so no pallet and no smooth trail. I think I gotta find a pallet.

By the time I got home I'd figured out my powder snow riding technique. I needed to sit farther back on the seat, I was standing up and putting too much weight on the skis. With me sitting back where the hand strap is the sled goes like stink even in the deep stuff. Of course it makes it hard to use my weight to balance. I need to figure out a combination method where I kneel back on the seat or something...

Wednesday, January 28, 2015

Ruined!

Finally got the clutch back for the Wankel Panther, the guy did a good job, we needed to get a new stationary sheave of eBay, the one he had wasn't that great and we wanted it to be right but realistically it didn't take all that long. Which reminds me I should send him some more money.

So I headed out to the garage to put it all back together. Sadly when I got the correct size o-ring for the magneto side I'd crammed the crank seal on. This was a big mistake because:
  • I hadn't cleaned the crankshaft on that side yet
  • I hadn't lubricated the shaft although I had lubed the seal itself
  • It was 10 degrees and the seal had shrunk
So what I accomplished was to tear the seal.


I went back and tried cleaning the shaft and lubing it but the damage is already done, the seal had rolled and torn. Its hard to get a picture of but if you look over by where the wires are you might be able to spot it.

That seal MIGHT work okay but I don't want to chance it. So I headed to Dennis Kirk and found they had one of the seals left. Since I ordered it they say "Part unavailable". So I better not screw this one up.

Okay so I'm stuck on that sled, better get the Pantera engine done. I've got 6 or 7 different pullers but none for the magneto on that sled. I'd bought a harmonic balancer puller for the Panther which worked great but the Pantera magneto uses 6mm bolts and the holes are very close together. I bought some 6mm bolts but they're grade 5 and I just managed to pull the threads off them.


This was a stupid kid mistake, I should have known better. The good thing about using grade 5 bolts is I didn't break anything important. It turns out theres a special puller just for this kind of flywheel. Runs almost $30. At least I was already ordering from Dennis Kirk so the shipping won't cost much extra...

*sigh*

Then yesterday with plenty of snow the '79 Polaris Cobra starts running on only the mag side. No power, spits and pops. I automatically figure its spark so I strip it down and clean the points which look clean anyway. Then I test it and it tests fine, spark on both side but now it won't run at all and theres no fuel in the filter.

I dunno on that one, I've got a couple crazy theories but I need time to look at it. Time I should have taken today but I got lazy.

Monday, January 12, 2015

Not so bad as all that

Here's the finale from yesterday's debacle:


Its not much but that little charred end is what was holding the piston in place. I tried burning the end off but couldn't get enough heat to soften it enough. In the end I pulled the tinwork and the head. I put a block of wood on top of the piston and whacked it a couple times with a hammer.

I'm not too upset about this whole deal, the engine is filthy, the exhaust gaskets were leaking and I think the head gasket on the PTO side (the one with the rope in it incidentally) was leaking too. I ordered a gasket set this morning which Dennis Kirk claims will be here by Friday. In the mean time I have plenty of cleaning to do.


This is the PTO side head, its not too dirty now but when I started there was a lot of mouse fluff in the fins, there was also a bunch of acorns in the space between the jugs, another good reason to get the engine out.


Thats the tin work from behind the exhaust, you can see its greasy nasty. I think the last person who worked on it (this'd be pre-2001 when Ed bought the sled) put both exhaust gaskets on the same side of the tinwork. Looking at it now I think the gaskets are supposed to sandwich the tinwork. Obviously I'll correct that when I put it back together.

Finally I've taken the topside tin and stripped it for paint. I debated not doing that but figure I ought to do it right while I have the time. Got lucky and the "Arctic Cat Spirit Powered" sticker came off whole so I can reuse it.

Sunday, January 11, 2015

Laugh at the idiot

As you know I've been fighting the clutch on my '78 Pantera for some time now. I finally got a new spring and pucks (Comet Duster) installed and then the dang engine was sticky, it'd only rock back and forth some. I thought it was maybe just from sitting although it'd only been a year, so I squirted a little oil in each side and worked it back and forth and it free'd up. So I put the plugs back in and tried to fire it up which is when it stuck SOLID.

Uh oh.

Today I finally got the engine out and found:


I'd been using a piece of recoil rope to keep the engine from turning while I worked on the clutch, I guess a piece got cut off on one of the ports and stayed inside. When I rocked it back and forth it must had slid out of the port but when I cranked it over it found the exhaust port. Now the thing is stuck hard so I think the only way to get it out will be to lift the jug. Guess I'll do a full gasket set while I'm there, it probably ought to have crank seals anyway.

The smart folks over at Vintagesleds.com along with the smart guys on the Okiebenz email list suggested I burn out the rope. with the exhaust manifold removed I can get right at the end of the rope. With it burned out I'd be able to crank the engine over and get the other piece out too. I've got a pencil torch so I can be precise about it. We'll see, I will of course take a picture and report.

While I've got the engine out I've got some work to do in the engine bay:


Years of accumulation in there, step one will be the vacuum cleaner. Because the engine sits so low its very hard to clean underneath it...

Also for once I managed to do a pretty good job packaging the pieces I took out:


It'd be all to easy to lose one of the bolts for the recoil or motor mount and then have to scab something in that would never be quite right...

Saturday, January 10, 2015

Frozen down!

Its been cold this week, Wednesday night temps hit -11F which is pretty cold for us. Last week it was really warm and even rained so it wasn't a big surprise when I went out yesterday to move the Jag and found it frozen to the ground. The Grand Touring had the same problem. I went through this a couple years ago and screwed up the Pantera clutch getting that sled loose so I didn't want to do that again.

The Vintagesleds.com crowd suggested I pour some boiling water on 'em so I put some pots on the stove:

I swept off the skis as much as possible so I'd melt as little snow as I could get away with.


boiling water right off the stove works great and it wasn't long before the Jag was free.


I heated the pots again and got the Grand Touring free too although I forgot to take pictures. I got lucky and neither the Cobra nor Pantera had frozen down.

After that I got Angie to help me drag the Pantera next to the garage so I can pull the engine out. I forgot to tell you that I finally took some time to get the clutch back together only to find out that the engine has mysteriously gotten stuck. I think its just moisture inside and hopefully bringing it in will clear it up. While I've got it out of the sled I figure I'll put new crank seals in it and maybe repaint the tin, its suffered in the last couple years sitting outside.

Friday, January 9, 2015

First repair of the year

Since the welding on the Ski-Doo was actually done last year (slow reporting I know) this becomes my first repair of 2015. I fired up the Polaris Cobra today to buzz around the yard. We really don't have enough snow to ride but enough to play. I got it going and for some reason looked under the hood and got gas in my eye. Turns out the fuel line to the left carb was leaking at the pump, spraying on the clutch and getting thrown up in the air. SO glad I found it before it sprayed onto the exhaust and caused a fire. I'd like to think I'd have smelled it but who knows?


I cut a piece of hose from my siphon kit and put it on with new zip ties. Its okay but even this one is stretched a little. I need to find a source for some really good gas line, clearly the stuff I used last year sucks.

Tuesday, January 6, 2015

An experiment gone right!

I'm still hampered by the fact that I haven't got any good inside storage for sleds, a plan is in the works for that but in the meantime I'm still limited to tarps in the yard. Sadly during the summer the stress of the tarp and the heat of the sun combine to bend the windshields on sleds where I can't easily remove the windshield. The big Ski-Doo and the Jag both have relatively easy to remove windshields but most vintage machines don't. Since the Cobra was about to get its first summer outside and it had a perfect windshield I wanted to do something to mitigate the damage.


In the end I cut a piece of foam insulation to roughly match the shape of the windshield and braced the other end against the handlebars. As you can see it worked out pretty well, I can detect no damage to the windshield at all.

I'm pleased by this, the wankel Panther and Pantera both have bent windshields that I've never bothered to try to bend back because I figured they'd just get bent again. With this technique I'm confident now that with some heat and time I can bend the other windshields back and have them not bend in again.

Friday, January 2, 2015

Back to the Wankel

With the Ski-Doo mostly straightened out (I still want to figure out why the speedo doesn't work, its not the speedo or the cable) I headed back to the Wankel Panther. The clutch has been sent out for repair so I want to make sure the crank seals are all set before that comes back. The PTO side is done so now its time to dig into the Mag side. I'd previously pulled the recoil, recoil cup and fan housing. With all that removed the engine is really small...

The fan is attached to the magneto. In the past I've had good luck pulling them with a 3 arm puller but this is the WRONG way to do it and can potentially crack the magnets ruining the magneto. So finally I got smart and picked up a harmonic balancer puller:

For $12 I feel like an idiot for not buying one sooner, this makes pulling the magneto almost childishly simple. The force of the pulling is applied so much closer to the shaft that almost none is wasted in the flex of the magneto and since its a straight pull theres little chance of the magneto flexing and binding on the shaft.

With the Magneto removed I'm staring at the stator and it looks like somebody has been here before, theres a nice index mark, you can see it just to the left of the top screw.


The one thing that really aggravates me about this sled is that there are no connectors in the wiring harness to the engine. This means the stator comes off with the plate that lives behind it.


Okay we're getting down to it now, the crank seal lives on that plate which, based on what I found on the other side I'd expect to have an o-ring also, except it doesn't and I can't figure where one would go...


Heres the engine side:


So I'm kind of in pause mode now. I posted on Vintage Sleds and sent a note to member 303Wankel who hopefully has done this before...

Thursday, January 1, 2015

More Ski-Doo welding!

Another day and more welding on the Ski-Doo. When I got it started there was exhaust pouring out all over the place. The pipe and can are really rusty and I'd done some real booger welding on it before so once more into the breach!

Heres some before:


The holes didn't look bad at first, you can see just a couple small holes in the first picture, the second is after I hit those same holes with the wire brush, the metal just evaporates.

Here's the U pipe from the main pipe to the can:


And after some welding effort:


This is actually some of the best welding I've ever done, I finally started to get a real feel for the puddle and how to make it move and get the "stack of nickels" look that is so desirable. You can see I've had to put multiple patches. When welding around a patch often I'll get some blow through. Normally I can rosette weld those spots but with metal this thin I end up welding a larger and larger area so for this work I started just adding more pieces of filler.

Heres a shot of the booger welds I did last time:

Thats also much heavier metal I welded in. The base was really rotted out that time and I had to be very careful to keep the pipe in shape as I built it back up. That metal is from a repair piece for a pickup bed and is I think 16ga steel, the stuff I'm working with now is from a computer case and is probably 18 or 20ga and much easier to form though I have to be a little more careful welding.