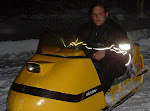
The seat on my 1979 Polaris Cobra was basically trashed. The cover had pulled back from the base which is a pretty common problem, and the sled had been left outside. That had caused the foam and wooden base to get totally saturated with water. I let it sit near the woodstove for a few days which got it basically dried out but the wood base was totally ruined. So I got a sheet of 3/8" plywood (which will help me with the '70 Ski-Doo as well) and cut out a new piece. Its actually a fairly complicated shape, it needs to fit around the light assembly at the rear and then around the lip that holds it up front. Plus there need to be two holes to attach at the rear. I painted the whole thing in a thick coat of black Rustoleum which makes it look original and should protect the wood. If I get another 30 years out of it I'll be satisfied. :)
The original base was molded into the foam so getting them apart without destroying the base (which I needed for a pattern) took some doing. When done I'd cut the foam in a couple places. I glued those back together and then glued the base onto the foam to keep them from sliding apart. Finally I wrapped my new seat cover over the top and stapled it to the base.
I bought the seat cover on eBay and I'll warn you that there are 2 versions, 1 is black, one is blue. I didn't notice that until I'd bought and received the black one. The original cover was blue. At this point after I'd cut the cover to make a hole for the taillights I'm not going to spend the money to get the correct one, after all it gives me a story to tell.
Anyway, once I get the rest of the sled completely ready (which means fixing the ski that only makes right turns) I'll mount the seat, but at this point I'm so close to being done I can taste it! If we only had some snow...
Monday, January 28, 2013

Friday, January 25, 2013
Whoops!
After coming to grips with the grips I decided it was a good time to take the Cobra for a rip around the yard. I'd had a little difficulty getting it started but considering it'd never really run enough to warm the engine up properly I'm not really concerned. This would also be the first ride since freeing up the brake, on the maiden voyage the sled was dragging badly because of that brake.
So the good news is with the brake released everything feels pretty spritely. The bad news is this:

Turns out the stop which should keep the ski from getting into that position is broken. It looks as though it was broken and rewelded poorly at some time in the past. Further forcing the ski back into place has bent the tie rod so that the right side ski is perpetually turning right. I'll have to fix the stop and straighten or at least shorten that right side tie rod to fix it.
On another note the seat is nearly ready. In getting the seat foam dry I finally had to resort to ripping the plywood base off. It was soaked and badly degraded. I got another sheet of plywood (which will help me with the Olympique too), cut and painted the base. Now I'm just waiting for it to dry before I finish. I'm debating gluing the base to the seat. Not sure what to do about that.
So the good news is with the brake released everything feels pretty spritely. The bad news is this:

Turns out the stop which should keep the ski from getting into that position is broken. It looks as though it was broken and rewelded poorly at some time in the past. Further forcing the ski back into place has bent the tie rod so that the right side ski is perpetually turning right. I'll have to fix the stop and straighten or at least shorten that right side tie rod to fix it.
On another note the seat is nearly ready. In getting the seat foam dry I finally had to resort to ripping the plywood base off. It was soaked and badly degraded. I got another sheet of plywood (which will help me with the Olympique too), cut and painted the base. Now I'm just waiting for it to dry before I finish. I'm debating gluing the base to the seat. Not sure what to do about that.
Got my grip on!
Last jobs on getting the heated grips wired up were to connect ground and power. For ground I pulled one of the screws that holds the handlebars in place, the Polly Heater grips come with a ring terminal that fit perfectly though I should have shortened the leads a little before crimping it together.
Finally for the hot lead there was a wire with a banana plug lying next to the fuel filter which was t-tapped into the voltage regulator. My test light show it was hot, I ran it through a 4a fuse to the switch.
I couldn't get the spade lugs Polly Heater provided to work with the wires since with the exception of the hot lead you're connecting 2 wires at a time so I used some other larger (and more protected) ones I had.

Finally for the hot lead there was a wire with a banana plug lying next to the fuel filter which was t-tapped into the voltage regulator. My test light show it was hot, I ran it through a 4a fuse to the switch.
I couldn't get the spade lugs Polly Heater provided to work with the wires since with the exception of the hot lead you're connecting 2 wires at a time so I used some other larger (and more protected) ones I had.

With everything connected I fired up the sled and flipped the switch, the headlight dimmed so clearly 2 things are true:
- Everything is wired up correctly
- The electrical system is marginal for these heaters.
Wednesday, January 23, 2013
Work continues
Got just a few minutes to work on the Polaris today, got one more fuel line cut and installed. I'd started this last weekend but ran out of zip ties. I always zip tie the fuel lines on since the time I had them fall off the El Tigre while I was riding...
I tried to reinstall the left carb which I'd removed Sunday to install a jet I'd accidentally left out. I'd left the carb off because it made it much easier to install the fuel lines but I found with the carb boot cold (about 5F) I couldn't get the carb to go into it, the rubber was too hard.
So I'm kind of stuck, I can't finish wiring the grips until I can run the sled to prove the wire I think should be a hot lead really is. I can't run the sled until I get the left carb installed and I can't get the left carb installed without it being warmer. I dare not run a heater near the carb boot because the left fuel line is disconnected and I don't want to start a fire. Until I figure out how to warm that carb boot up I'm sunk.
On the seat front I finally had to tear the plywood base off the seat, it was holding moisture like crazy and I didn't want to install the seat with the new seat cover knowing I'd have to redo it soon. Although in the spring I still want to pull the seat, sand the tunnel and repaint. Clearly the moisture buildup there has been a problem for some time. Unfortunately I don't have any 3/8" plywood on hand and Angie took the pickup truck to work today so I could put the snow tires on my car. Tonight I'll plug in the car's block heater (its supposed to be below zero tonight) so she'll have no excuse not to take the car tomorrow.
I tried to reinstall the left carb which I'd removed Sunday to install a jet I'd accidentally left out. I'd left the carb off because it made it much easier to install the fuel lines but I found with the carb boot cold (about 5F) I couldn't get the carb to go into it, the rubber was too hard.
So I'm kind of stuck, I can't finish wiring the grips until I can run the sled to prove the wire I think should be a hot lead really is. I can't run the sled until I get the left carb installed and I can't get the left carb installed without it being warmer. I dare not run a heater near the carb boot because the left fuel line is disconnected and I don't want to start a fire. Until I figure out how to warm that carb boot up I'm sunk.
On the seat front I finally had to tear the plywood base off the seat, it was holding moisture like crazy and I didn't want to install the seat with the new seat cover knowing I'd have to redo it soon. Although in the spring I still want to pull the seat, sand the tunnel and repaint. Clearly the moisture buildup there has been a problem for some time. Unfortunately I don't have any 3/8" plywood on hand and Angie took the pickup truck to work today so I could put the snow tires on my car. Tonight I'll plug in the car's block heater (its supposed to be below zero tonight) so she'll have no excuse not to take the car tomorrow.
Saturday, January 19, 2013
Arctic Cattin around
My '78 Arctic Cat Pantera has been sitting for a couple weeks now, I took it for a ride after our first snow of the season and on the way back decided to open it up and "blow out the cobwebs". That turned out to be a big mistake, as soon as I got to full throttle the sled bogged and died. I got it started again but didn't get far before it quit again. Rinse, lather, repeat.
Finally I called Angie to come get me and we towed the sled home the last half mile with the pickup. What an inglorious way to arrive. The sled restarted easily and seemed to be back to running normally until I once again went for full throttle. This time when it died it stayed that way.
Finally today I got a chance to get out and clean the carb, in doing so I found a mouse nest in the airbox. Clearly when I went for full power I pulled crud into the carb... Wasting no opportunity I shot a video as I cleaned, hopefully in a week or two I'll have it up here for you to see.
So now the sled runs, it doesn't idle well though, I can't tell if thats watery gas or if I didn't get the idle jet clean enough. I may just run it a little more and see if it cleans itself up.
Finally I called Angie to come get me and we towed the sled home the last half mile with the pickup. What an inglorious way to arrive. The sled restarted easily and seemed to be back to running normally until I once again went for full throttle. This time when it died it stayed that way.
Finally today I got a chance to get out and clean the carb, in doing so I found a mouse nest in the airbox. Clearly when I went for full power I pulled crud into the carb... Wasting no opportunity I shot a video as I cleaned, hopefully in a week or two I'll have it up here for you to see.
So now the sled runs, it doesn't idle well though, I can't tell if thats watery gas or if I didn't get the idle jet clean enough. I may just run it a little more and see if it cleans itself up.
Friday, January 18, 2013
Coming to Grips
The mailman delivered my new Poly Heaters grips today so even though it was 10F in the garage I knew I needed to put in some time.
Outside grip Poly Heaters are nice because they're easy to install, slide 'em over the bar, drill a 1/8" hole, install a screw and you're done. If they need to come back off its no big deal, especially if you spray the bar with something like WD-40. Normally WD-40 is something to avoid, its not a lubricant although most people use it for that purpose. In this case it makes a nice water seal between the bars and the grips and it dries to a film that sticks around and resists rust a little.
I had to spend a little time on the throttle side because at full throttle the grip would grab the thumb throttle a little and hold it wide open, obviously not something I want to encounter on the trail! A few seconds with the drum sander in my rotary tool plus installing the throttle side grip a little farther out cleared up the interference issue and I got both grips installed.


Outside grip Poly Heaters are nice because they're easy to install, slide 'em over the bar, drill a 1/8" hole, install a screw and you're done. If they need to come back off its no big deal, especially if you spray the bar with something like WD-40. Normally WD-40 is something to avoid, its not a lubricant although most people use it for that purpose. In this case it makes a nice water seal between the bars and the grips and it dries to a film that sticks around and resists rust a little.
I had to spend a little time on the throttle side because at full throttle the grip would grab the thumb throttle a little and hold it wide open, obviously not something I want to encounter on the trail! A few seconds with the drum sander in my rotary tool plus installing the throttle side grip a little farther out cleared up the interference issue and I got both grips installed.


I routed the wiring for the heaters down the bars with a couple zip ties and found there was already a hole drilled to install the switch near the keyswitch.

Here you can see the switch for the heaters installed between the keyswitch and the choke control. Its not wired up all the way yet, I wired from the heaters to the switch but I still need to figure out where my ground is coming from and where I'm going to pick up power. Theres a wire tapped out of the voltage regulator already which I suspect will provide ground and ground shouldn't be too hard to come up with. Before I do anything else though I need to get a fuse to install between the switch and the power lead. There aren't really any fuses on this sled at all as it has such a simple electrical system and I don't want a shorted heater to burn my sled down...
Thursday, January 17, 2013
BRAKES!
Got to spend some time in the garage the other night, one of the problems with the '79 Polaris Cobra is the lack of brakes. The brake caliper on this system has 2 pads, one the caliper pushes against another which stays still in the caliper. Polaris has long used hydraulic brakes and in this case the driven pad is hydraulically actuated and on my sled that pad was stuck.
I found that using a big screwdriver I could pry the pad back away from the disc but when I applied the brake and the pad moved back in it would be stuck against the disc again. I pried and applied and pried and applied and while it seemed like it was getting a little better I wasn't gaining much.
Realistically I knew I needed to pull the caliper and properly clean everything. Unfortunately on this sled the brake caliper is attached to the chaincase inboard of the driven clutch. The driven clutch has to come off for this to happen and the chaincase has to come apart for that. I got as far as opening the chain case and pulling the chain and top sprocket before I gave up. Fortunately with the top sprocket removed the driven clutch can turn since you're not trying to push the track which helped with freeing the pad.
Finally in desperation I carefully squirted a little PB Blaster around the edge of the pad, now when I worked it back and forth I could feel it getting looser and eventually I could apply the brake and it would release easily. With that accomplished I sprayed some brake cleaner on the pad and disc so the PB Blaster wouldn't grease the brakes and everything seems good.
Its a good feeling to make progress.
I found that using a big screwdriver I could pry the pad back away from the disc but when I applied the brake and the pad moved back in it would be stuck against the disc again. I pried and applied and pried and applied and while it seemed like it was getting a little better I wasn't gaining much.
Realistically I knew I needed to pull the caliper and properly clean everything. Unfortunately on this sled the brake caliper is attached to the chaincase inboard of the driven clutch. The driven clutch has to come off for this to happen and the chaincase has to come apart for that. I got as far as opening the chain case and pulling the chain and top sprocket before I gave up. Fortunately with the top sprocket removed the driven clutch can turn since you're not trying to push the track which helped with freeing the pad.
Finally in desperation I carefully squirted a little PB Blaster around the edge of the pad, now when I worked it back and forth I could feel it getting looser and eventually I could apply the brake and it would release easily. With that accomplished I sprayed some brake cleaner on the pad and disc so the PB Blaster wouldn't grease the brakes and everything seems good.
Its a good feeling to make progress.
Subscribe to:
Posts (Atom)